Confetti Sugar Cookies

Confetti Sugar Cookies

I was scrolling through pins on Pinterest and a photo from Deliciously Sprinkled caught my eye.  While the Funfetti cake looked absolutely delicious, I was really drawn to the color of the sprinkles she used. The colors were just so vibrant, with every color of the rainbow.  Most importantly, they don’t have any brown sprinkles which I don’t like the look or taste of.  In the post, Jenn said she bought them in bulk from Nuts.com. I haven’t heard of Nuts.com before, but I certainly had to check out these sprinkles.  Not only are they beautiful in color but they are only $2.99/pound!  I also like that these jimmies have more of a crunchy texture rather than a waxy texture like other sprinkles. I know they are only sprinkles and it’s probably silly how I talk about them like I am in love or something. But, I can’t help but get excited about new baking product finds and I had to share. I immediately ordered 2 pounds of the rainbow jimmies, a pound of nonpareils, a bunch of dried fruit and nuts. My kids especially loved the dried strawberries, dried berry mix and dark chocolate covered almonds.  There are so many things I still need to try.

So, now that I had 2 pounds of rainbow jimmies, I had to find something to make with them. I really didn’t feel like making cake or cupcakes. Instead, I decided to make these confetti cookies and they were exactly what I was looking for.  I like that there aren’t many ingredients; it’s all stuff you probably have on hand. The dough comes together easily and quickly and in no time, you have about 3 dozen delicious buttery sugar cookies. The texture of these cookies is really soft, which is a nice contrast to the sugar crust on the outside.  Sadly (embarrassingly?), we tore through all these cookies in only 2 days. And in 2 weeks, I went through a whole pound of rainbow jimmies between these confetti cookies and another super delicious frosted sugar cookie recipe that I hope to share soon.

Confetti Sugar Cookies

Yield: ~36 cookies (I got 34)

1 1/3 cup butter @ room temperature

1 1/2 cups sugar

2 eggs

2 teaspoons vanilla extract   I used vanilla bean paste

3 1/2 cups all-purpose flour

1 teaspoon baking powder

1 teaspoon salt

3/4 cup sprinkles   Jimmies don’t bleed like nonpareils (the beads)

granulated sugar for the top of the cookies   (optional)

Directions:

Preheat oven to 350F

Line a baking sheet with parchment paper or a Silpat

In the bowl of your KitchenAid mixer, beat together the softened butter and sugar with the paddle attachment. Continue to beat until light and fluffy ~ 3 minutes.

Beat in the 2 eggs and vanilla until completely combined.

In a small bowl, with a whisk, combine the flour, baking powder and salt.

Slowly add the flour mixture to the butter mixture, mixing until combined and the dough comes together.

Gently fold in the sprinkles with a spatula to prevent the colors from bleeding.

With a cookie scoop, drop balls of dough on the prepared baking sheet, about 1-inch apart.

Optional step: Place about a 1/4 cup of granulated sugar in a small bowl. Roll just the top of each dough ball into the sugar  (this makes them sparkle and gives them a sweet crust)

Bake for ~11 minutes or until edges are just starting to turn golden. (Turn the cookie tray around at about 6 min). The tops will look just slightly underdone.

Cool for 5 minutes on the cookie sheet. Transferring to a cooling rack to cool completely.

Source:  Buns In My Oven adapted from allrecipes.com

Note: I don’t have any affiliation with Nuts.com, nor was I paid at all for this post. I just really like their products and wanted to share.

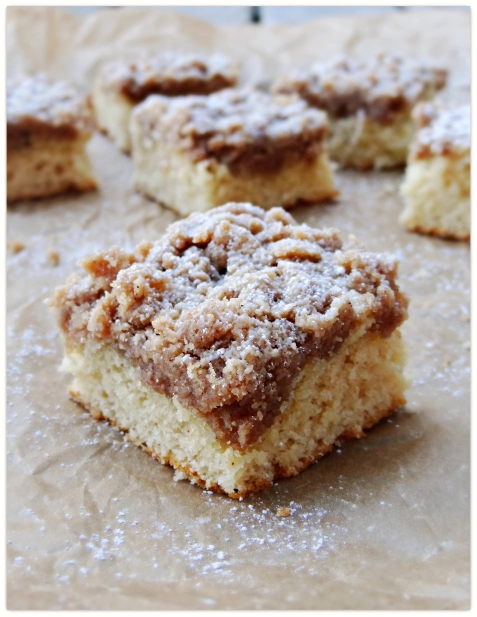
Johnny’s Crumb Cake

Johnny's crumb cake

I think the first time I saw or even heard of Johnny Iuzzini was when he was a judge on Top Chef.  To me, there isn’t anything much cooler than a motorcycle riding, modern-day Elvis looking guy with tattoos who also happens to be a pastry chef.  Super cool!  I saw Johnny wrote a new book, Sugar Rush, but unfortunately, I was not able to cross it off my Christmas wish list. Luckily I came across this crumb cake recipe from his book, so I thought I would try a recipe before I bought it.  Since it will probably be a long time before I get to taste one of his actual desserts, making one of Johnny’s recipes is the next best thing. And, crumb cake is a perfect place to start because everyone in my family loves coffee cake. What I love about this recipe is that as a pastry chef, besides the traditional measurements, all the ingredients are given by weight. Baking is about being precise and if you say you aren’t a baker, this is the way to get good results every time as long as you have a good, reliable recipe. No measuring cups are needed, you just keep adding ingredients and zeroing out the scale for each new ingredient. I had my scale for like a year before I used it because for some reason, even as a pharmacist, using it was intimidating probably because it was just different from what I was used to. But now, if there are weight measurements, I use them.  You won’t believe the difference.

A few notes about this recipe. First, the batter barely covers the pan. I checked the pan size like five times, but it is 13×9.  I was worried that I would have a really short cake. Second, the crumb is very wet and heavy and there is a ton of it compared to the cake. Given those two things, I didn’t think there was any way this recipe would work out. But, I knew I measured everything correctly, so I put it in the oven and crossed my fingers.  I was pleasantly surprised to see how much the cake rose. The cake is really fluffy and light, compared to some crumb cakes that can be a little dense. The crumb gets really crunchy on top, providing a perfect texture contrast to the cake.  Honestly, no joke, this one of the best crumb cakes I ever had.

Johnny Iuzzini’s Crumb Cake
Yield: 13×9 cake
Cake
2 cups all-purpose flour (250g)
5½ tablespoons (1/3 cup) unsalted butter (75g)
½ cup granulated sugar (100g)
1 large egg, at room temperature
¼ cup sour cream, at room temperature (60g)
⅔ cup milk, at room temperature (160g)
1 tablespoon vanilla (15g)
1 tablespoon baking powder (12g)
pinch of kosher salt
Crumb topping
2¼ cups all-purpose flour (280g)
1¼ cups packed light brown sugar (290g)
1 tablespoon ground cinnamon (6g)
2 sticks unsalted butter, melted (226g)
Instructions:
Take out and measure the ingredients that need to be at room temperature: sour cream, milk, eggs and butter.
Make sure the baking rack is in the middle of the oven. Preheat to 350ºF.
Spray a 9×13-inch glass baking pan (I used a metal pan) with Pam. Lightly dust with flour and tap out any excess
In the bowl of your KitchenAid, beat the butter and sugar with the paddle until light and fluffy, ~ 3 minutes.
Add in the egg and sour cream. Mix until combined.
In a measuring cup, whisk together the milk and the vanilla.
In a medium bowl, whisk together the flour and baking powder. Sprinkle in the pinch of salt
With the mixer on low, alternately add the wet and dry ingredients. Start and finish with the dry ingredients. Make sure to stop to scrape down the sides of the bowl as needed, unless you a have a beater blade that does this for you
Spread the batter evenly into the prepared pan. Note: this barely covers the bottom of the pan.
Now, for the crumb topping:
In a large bowl, whisk together the flour, brown sugar and cinnamon until uniform.
Pour in the melted butter. Stir until completely moistened. This will be heavy, wet and lots of it. Make sure to use it all.
Roll the mixture between the tips of your fingers to make small balls of crumb
Scatter the topping evenly over the top of the batter in the pan, right from your hands as you roll it. Completely cover the cake batter. It will be about half cake to half crumb.
Bake for about 30 minutes or until the center of the cake is firm to the touch and it springs back lightly when pressed.
Note: If the cake is not done in 30 minutes, reduce the temperature to 325ºF and continue to bake until done- checking frequently
Remove the cake from the oven. Lightly dust the cake with powdered sugar.
Allow the cake to cool completely and give it a generous dusting of powdered sugar
Source: Sugar Rush by Johnny Iuzzini, as seen on Taste and Tell

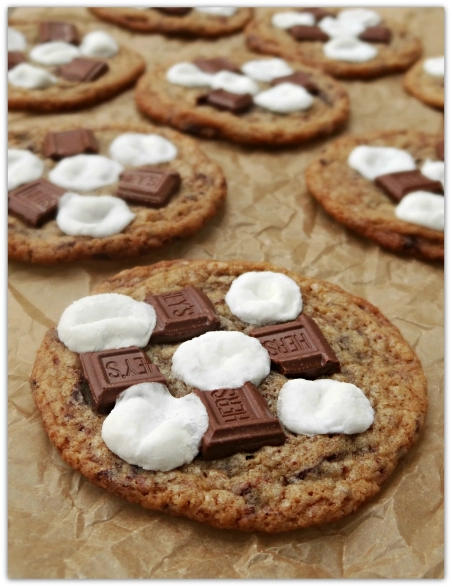
S’mores Cookies

S'mores cookies


When I was a kid, I had the greatest time being a Brownie and then a Girl Scout. Now that my daughter Sammie is also a Brownie, I sometimes find myself thinking back to those days. One thing I loved about being a Girl Scout was camping.  Okay, so not in a tent in the grass but in a cabin on a cot, cooking our food by campfire, hiking, and horseback riding. That’s roughing it, right? At least kind of? A few things immediately come to mind from my Girl Scout days: one is sharing all those experiences with one of my best friends, Sara, and roasting marshmallows by campfire with sing alongs and ghost stories. What kind of Girl Scout would one be without a love for s’mores? Well, I do know one who doesn’t. My daughter. She just doesn’t like graham crackers, nor does my oldest son. When they go camping with my husband ( I “volunteer” to stay home with our 3 year old son), they have roasted marshmallows on fudge striped cookies. But, I just adore this flavor combination, so I had to find a way my kids could enjoy it too. A couple years ago, I found these s’mores cookies and I’ve made them several times since.  They are so delicious, but they somehow got lost in all the other baking I do. The base is essentially the same as that of a regular chocolate chip cookie, but you replace some flour with graham cracker crumbs. In the last few minutes of baking, you press a few marshmallows and some Hershey chocolate bar pieces into the top of the cookie. They are then finished in the oven until the marshmallows are gooey and the chocolate is melted just enough to stick. In the end, you get a fun cookie totally tasting like smore’s that I just know your kids, or the kid in you, will love.

S’mores cookies

Yield:  Recipe says 4 dozen, I got 26 but made mine quite a bit larger.

1 3/4 cups all purpose flour   + 1/2 tsp cornstarch
1 cup graham cracker crumbs   I bought mine as crumbs but you can process some graham crackers until they are crumbs
1 teaspoon baking soda
1 teaspoon salt
1 cup butter, softened
3/4 cup granulated sugar
3/4 cup brown sugar
1 teaspoon vanilla extract   I used vanilla bean paste
2 eggs
2 cups miniature chocolate chips  I prefer chopped chocolate: 1 cup semi-sweet and 1/2 cup milk chocolate
1 1/2 cups mini marshmallows
2 Hershey milk chocolate bars, chopped   I used 4.5 bars

Directions:

Preheat oven to 375F

Line a cookie sheet with parchment paper or a Silpat

In a medium bowl, whisk together the dry ingredients: flour, cornstarch, graham cracker crumbs, baking soda, and salt.

In the bowl of your KitchenAid, beat together the butter, sugar, brown sugar and vanilla until creamy.

Add the eggs in one at a time and beat well after each addition

Slowly beat in the flour mixture until combined

Stir in the chocolate chips or chunks by hand with a rubber spatula until evenly distributed

Drop by a rounded tablespoon onto the prepared cookie sheet. I used a 1.5 tablespoon ice cream scoop so I got fewer, but larger cookies. I got 9 cookies on a sheet.

Bake for 8 minutes (mine were 9 min) and remove from the oven.  They should be underdone.

Press 4 marshmallows and some pieces of Hershey bar into each cookie.

Return the cookie sheet to the oven to bake another 3-4 minutes until almost completely cooked. They will finish cooking on the cookie sheet for about 2-3 minutes.  Do not over-bake.

Remove the cookies from the sheet and cool them on a wire rack.

Source:  Two Peas and Their Pod; originally from Baked Perfection

Note: These recipes were exactly the same except for the amount of flour. The original recipe calls for 1.5 cups of flour and the Two Peas recipe calls for 2 cups. I split the difference and used 1 3/4 cup of flour. It turned out perfect for me.

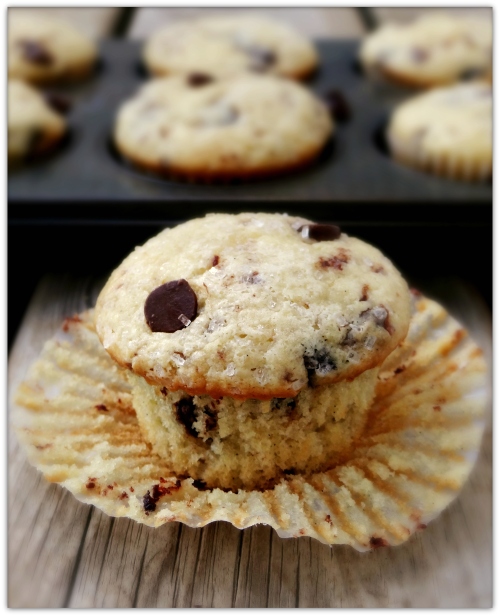
Chocolate Chip Sour Cream Muffins

Chocolate chip sour cream muffins


As I have mentioned before, my kids love those Hostess mini muffins. They are so expensive and I know, not so good for you. I am always on the look out for some muffins I can make that the kids will eat and I can pronounce all the ingredients. I came across these a while back, I’m sure while browsing Pinterest, and knew they would fit the bill.  One of my favorite recipes, one step pound cake, contains sour cream that gives it a wonderful texture and richness. So, I guess that’s what drew me to this recipe.  This muffin batter is so super fast to put together that I can make it, hop in the shower, get dressed, take them out of the oven and give them to the kids for breakfast before school.  My 7-year-old daughter, Sammie, is not a morning person and absolutely hates to get out of bed for school.  But, when I tell her I made these muffins, she jumps out of bed and runs upstairs to get some. These are just perfect for Monday mornings when no one wants to get up and they are a great way to start the week off with happy kids with big chocolate covered lip smiles.

Chocolate Chip Sour Cream Muffins

Yield: 12 standard muffins or 36 mini muffins or 24 mini muffins + 5 standard muffins

1 and 1/2 cups all-purpose flour

2/3 cup sugar

3/4 teaspoon baking powder

3/4 teaspoon baking soda

1/4 teaspoon salt

1 large egg

1 cup sour cream

5 tablespoons unsalted butter, melted and cooled a bit

1 teaspoon vanilla extract   I used vanilla bean paste

1 cup semi-sweet chocolate chips   I use ~3/4 cup mini semi-sweet chips with 1/4 cup finely chopped milk chocolate bar  (plus extra chips for the tops)

Coarse sugar crystals  optional

Directions:

Preheat oven to 350 F

Place muffin liners in your cupcake tin (how many depends on the size muffins you are making; see yield)

In a large bowl, mix together the dry ingredients: flour, sugar, baking powder, baking soda, and salt.

In a medium bowl, combine the wet ingredients: the egg, sour cream, melted butter, and vanilla extract (or paste).  Whisk until well combined.

Pour the wet ingredients into the dry ingredients. Stir gently with a rubber spatula until just combined.  If you stir too much, you will get dense muffins.

Gently fold in the chocolate chips (and chocolate pieces if you are using)  until just combined through.

With an ice cream scoop. fill each muffin liner about 3/4 full.

Add some decorative chocolate chips to the top of each muffin.   I like to sprinkle coarse sugar crystals on top for sparkle and crunch.

Bake until a toothpick in the center of the muffins comes out clean, about 14-18 minutes.  For the minis, it took about 14 min and the large muffins more like 18 min.

Allow them to cool on a wire rack until cool enough to handle. If you can..

Source:  The Curvy Carrot

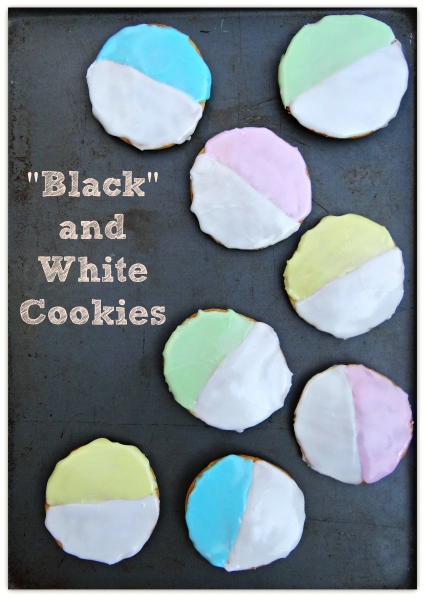
“Black” and White Cookies

"Black" and White Cookies

I must admit, I am a total magazine junkie. I have like 10-12 subscriptions going at a time. Cook’s Illustrated, Cook’s Country, Taste of Home, Taste of the South, All-You, Simple and Delicious, Woman’s Day…..As if I have time to read them all. I usually keep them in a stack on my nightstand and try to read one before bed. I was flipping through Good Housekeeping recently and I saw this recipe for “black and white” cookies. I have made true black and whites before, but the spring colors on these really caught my eye.  Why didn’t I think of this?  There is no chocolate frosting, much to my husband’s delight.  Instead you have half white and half a pretty pastel or whatever color you choose. How cute!

Justin was gone all weekend coaching his high school team in the national scholastic bowl tournament, so I decided to bring the kids to my parents for the day.  When I show up with all 3 kids, I feel like I need to bring some type of baked good as peace offering. 🙂 So, I got up super early and started these cookies. They were all baked and I was just starting to frost them when my 3 year old son and 7 year old daughter woke up. Oh boy. Now, I had to work quickly and so sorry, the frosting job isn’t the best. I let my daughter frost the last few cookies while I took pictures and left those home for Justin, taking the rest to my parents. When I got home, I just walked in the door and Justin was asking “Where are the rest of those cookies?!  They are like bakery quality!”  I was glad to hear that because when I first made them, I was disappointed when I tried them..too powder sugary. Ugh, the wasted time and ingredients. But, after they set for about 6 hours or so, the flavors combine nicely and they were just delicious. They are super soft, cake-like actually. And the frosting is thick and sweet, with a pretty sheen. These cookies are quite a PITA kind of project, but given Justin says they are the best thing I have made all year, I believe I will be making them again soon.  Father’s Day perhaps??

“Black” and White Cookies
Yield: 36 cookies   I only got 24 cookies, but I think I made them too big

For the cookies:

2 cup all-purpose flour
1/2 teaspoon baking soda
1/4 teaspoon salt
3/4 cup (1 1/2 sticks) butter, softened
1 cup granulated sugar
2 large eggs
1/2 cup buttermilk, well shaken

Preheat oven to 350F.
Line a cookie sheet(s) with parchment. I prefer to bake cookies 1 sheet at a time.
In medium bowl, combine flour, baking soda, and salt with a whisk.
In the bowl of your KitchAid, on medium with the paddle, beat butter and granulated sugar ~3 minutes or until fluffy.
Beat in eggs one at a time.
With the mixer on low, add flour mixture alternately with buttermilk. Begin and end with the flour mixture.  I did 3 additions of flour, separated by 2 buttermilk. 
Drop dough by rounded tablespoonfuls about 2 inches apart onto the cookie sheet(s).
Bake 13 to 15 minutes or until golden, rotating the sheet(s) halfway through.
Allow cookies to cool on the cookie sheet for a few minutes before transferring to a cooling rack- bottoms up.

For the glaze:    (or this one)

1 pound powdered sugar
2 Tablespoons of milk   (not nearly enough, I added 6 tablespoons total)
2 tablespoon light corn syrup
1/8 teaspoon salt
1/2 tsp vanilla (optional)
Assorted food colorings   Americolor is best

In a bowl, with your hand mixer or KitchAid on low, beat the powdered sugar, corn syrup, milk, and salt until smooth.
Start with the 2 tablespoons milk called for in the recipe and add 1 tablespoon at a time until you get the right consistency. You want it spreadable, but not thin.  I added 6 tablespoons total.
Keep 1/2 of the icing white in the mixing bowl.
The other half of the icing can be divided into bowls and dyed with food coloring as desired.
Spread the icing on the cookie’s flat sides. I did the white first, then the colored side.
Let set 30 minutes.

Source:  Good Housekeeping, Note: the online recipe left the milk out of the glaze.


Blueberry Streusel Muffins

Blueberry streusel muffins

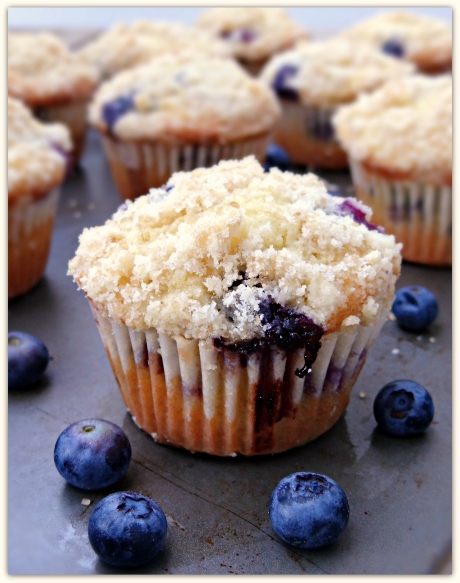
Ever since I saw these delicious looking blueberry muffins, I have been wanting to make them. But, blueberries have been expensive, so I haven’t.  When I went to the grocery store the other day though, they were $4 for a pint. Not too bad, so I bought them. I was excited to finally make these muffins. But, then I did what I usually do and didn’t read the whole recipe.  Damn. I realized I didn’t have any Sugar in the Raw and I wanted to follow the recipe as written. So, alas, I had to wait another day to go to the store AGAIN. But, actually it is okay because I found a recipe for chocolate chip cookie sandwiches filled with marshmallow fluff frosting that I want to make…so I grabbed some Fluff too. I haven’t made the cookies yet, but I cannot imagine them to be anything short of amazing. Of course, I will share. Anyways, back to the muffins. They were easy to put together and baked up beautifully with perfect rounded tops.  The cake part is fluffy and not too sweet, the blueberries are juicy, and the raw sugar gives the buttery streusel a wonderful crunch.  Oh, the muffins were just as I hoped they would be.

My picky family won’t eat these muffins as they don’t like cooked fruit. But, they sure tear the heck out of any kind of raw fruit, so I can’t complain.  As much as I love blueberry muffins, I can’t shouldn’t eat all 12 muffins myself. So, I will be bringing them to work tomorrow. Too bad there are only 12 though. Actually, make that 11 because I ate one for quality control. I mean, how else could I tell you about them? But, 11 muffins and about 30 coworkers?  Those are bad odds.  I know it will be Monday morning, but they better move fast 🙂

Blueberry Streusel Muffins
Yield: 12 standard size muffins

Crumb Topping

1/3 cup all-purpose flour
1 1/2 Tbsp granulated sugar     I used vanilla bean sugar
2 1/2 Tbsp chilled butter, diced into small cubes
1 1/2 Tbsp Sugar in the Raw

In the bowl of your food processor: Add 1/3 cup flour, 1 1/2 Tbsp granulated sugar and the cold butter cubes.

Pulse for a few seconds, just until the butter is evenly distributed throughout and the crumbs just come together in tiny crumbles. Note: The crumb mixture should still be fluffy. If you pulse too much, the crumbs become heavy and sink.

Pour the crumb mixture into a small bowl. Mix in 1 1/2 Tbsp raw sugar lightly with your fingers. Set crumb mixture aside.

Muffins

1 3/4 cups all-purpose flour
1 tsp baking powder
1/4 tsp baking soda
1/2 tsp salt
1 cup granulated sugar
7 Tbsp vegetable oil     (you can measure 1/2 cup, then remove 1 Tbsp)
1/4 cup buttermilk   shake well
1/4 cup sour cream
2 large egg eggs
1 1/2 cups fresh blueberries    Washed, dried, and all stems removed

Preheat oven to 400F.

In a medium mixing bowl, add the flour, baking powder, baking soda and salt. With a wire whisk, mix for ~30 seconds or so. Set the dry ingredients aside.

In a large mixing bowl, add 1 cup granulated sugar, vegetable oil, buttermilk, sour cream and eggs. With a wire whisk, mix until well blended, ~30 seconds. Fold the flour mixture into the wet ingredients with a rubber spatula until just combined. Note: the batter should still be a bit lumpy. If you over mix, you will not have fluffy, tender muffins. Who wants that?

Gently fold in the blueberries with a rubber spatula.

With a large ice cream scoop, divide muffin batter evenly into 12 paper lined muffin cups. Take the the crumb topping, fluff it a bit with your fingers and sprinkle the entire top of each muffin (about 1 tbsp per muffin).

Bake muffins about 18 – 22 minutes, rotating the muffin tin halfway through the baking time, until they are lightly golden and pass the toothpick test.

Cool the muffins several minutes in the pan before removing to wire rack to cool.

Source: Cooking Classy

What’s Baking Red Velvet Round-Up

February was my month to host our What’s Baking blog group. I chose red velvet as the theme because it only seemed fitting with Valentine’s Day.  And, I realized, I haven’t baked anything red velvet and it’s about time I did. I just love the contrast of the bright white cream cheese frosting to the red velvet base- whether it be cake, cookies, brownies or whatever.  And, the chocolate flavor is so mild, even my husband can enjoy it and he did indeed.

Whats Baking Badge

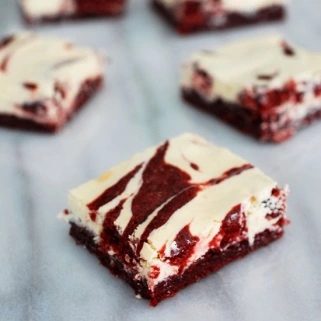
My good friend Eva, of Eva Bakes, made these amazing looking red velvet marble brownies.  I almost made brownies too, but at the last-minute went with cookies instead. These look so crazy delicious that I had to put them to the top of my baking to do list.

Red velvet cheesecake brownies by Eva Bakes

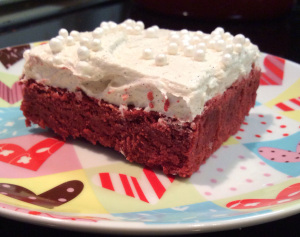
Alison, of Sparks from the Kitchen, made red velvet cookie bars with vanilla bean frosting.  Butter cream frosting is always made better by the addition of real vanilla bean and these look delicious. I have never made the red velvet version, but frosted sugar cookie bars are one of my favorite things to bake. Why?  Because they have the taste of soft frosted sugar cookie with much less work and my family absolutely loves them. My husband has been known to eat most of the pan himself.

Red Velvet Cookie Bars - Sparks from the Kitchen

Nicole, of Seven Ate Nine (can’t help but love this blog name), made Red Velvet Cake Batter Squares.  She had these bars at her rehearsal dinner at The Blue Willow Inn almost 5 years ago and was able to recreate them from the inn’s cookbook. I love how food can bring you back to a day and you can almost relieve that memory as you eat it.  And, I also love that these bars have just 5 ingredients.  I mean really, it can’t get any easier than that!

Red Velvet Cake Batter Squares- Seven Eight Nine

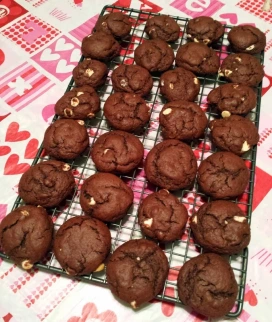
Ange, of The Tiny Tyrant’s Kitchen, made red velvet chocolate chip cookies.  Chocolate chip cookies have always been my favorite dessert to eat. I have never had red velvet chocolate chip cookies before but I’m thinking that should change.  Ange had the same problem I did.  Our red velvet wasn’t as red as we would have liked because of the brown color of the cocoa. But, never mind that because these look delicious.

Red velvet chocolate chip cookies- The Tiny Tyrant's Kitchen

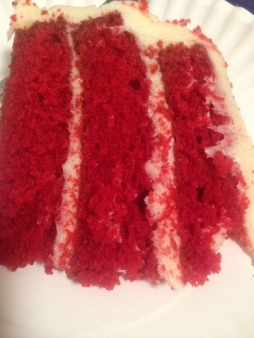
Carrie, from Carrie’s Sweet Life, made a red velvet cake with cream cheese frosting for her grandmother’s birthday. Until now, Carrie had the same problem I do, and that is finding a homemade cake that she likes. I have found homemade cake to be too dense or too dry. This is the cake that changed all that for Carrie… as it was moist, the frosting wasn’t too sweet..in other words perfection.  I’ll have to give it a try. I have been meaning to make a layer cake so I can use the beautiful and incredibly thoughtful engraved cake server set my husband gave me for reaching a million views in November.  Awww…

Red Velvet Cake from Carrie's Sweet life

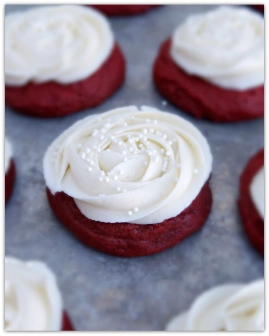
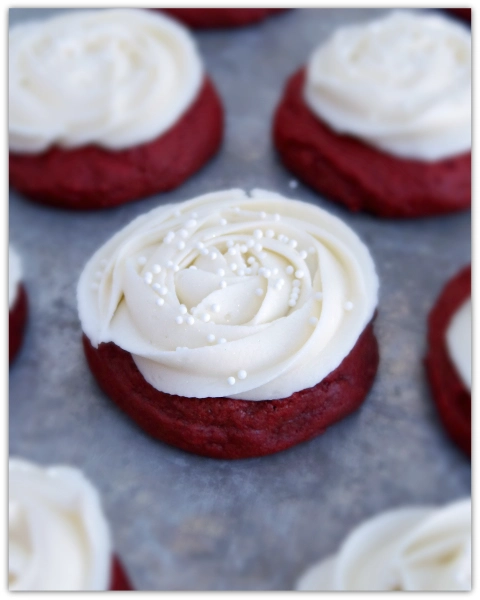
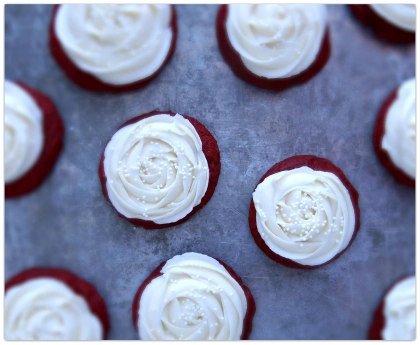
And, I made soft red velvet sugar cookies with cream cheese frosting.  In this house, we love soft, frosted sugar cookies.  So, I thought a red velvet version would be just perfect. And, I was so right. These cookies were amazing. They were really soft, with a hint of cocoa, and the most delicious cream cheese frosting.  Honestly, there aren’t too many recipes I make more than once because there are just so many I want to try.  But, I see more of these cookies in my future. So delicious and pretty too.

Soft red velvet sugar cookies with crea cheese frosting

Soft Red Velvet Sugar Cookies with Cream Cheese Frosting

Soft red velvet sugar cookies with cream cheese frosting

February is my month to host the group, What’s Baking.  With Valentine’s Day and all, I thought red velvet would be appropriate.  I don’t think I have ever made anything red velvet. I’m really not sure why. But, it’s been on my baking to do list for a long time, so let’s cross this one off.

I had a hard time figuring out what to bake. Brownies, cookies, cake, cupcakes?  So, many to choose from. But, if you’ve been here before, you know my family’s love for soft, frosted sugar cookies. You know, the Lofthouse style ones? I finally came across these red velvet cookies with cream cheese frosting and immediately knew they were it.  Have you ever visited the blog Cooking Classy?  If not, you totally should.  Jaclyn’s pictures are just beautiful and everything she bakes looks amazing.  I can’t tell you how many things I’ve pinned.  Now, I just need to find the time…

These cookies were easy enough to make.  But, I think I should have used regular cocoa versus the Dutch processed.  The color would have been more red and a bit less muddled. But, I guess that’s just aesthetics and I need to get over it. For Jaclyn’s cookies, it looks like she frosted them by hand. I can never make my cookies look nice that way, so I chose to pipe them instead.  I pulled out like 10 different colors of sprinkles, but I loved the white against the white frosting.  Then, I decided white sprinkles weren’t enough, so I added some disco dust for sparkle. Disco dust…say what?  I have never heard of it before either. It’s edible glitter and it will make your cookies look beautiful.

The verdict? My husband and kids absolutely loved them. I had 21 cookies yesterday and only 4 today.  These cookies are really soft, with just a hint of chocolate which pairs perfectly with the sweet cream cheese frosting.  If you haven’t made anything red velvet, or you have and you’re crazy for it, make these cookies. You’ll love them. Promise.  Another keeper for me.

Stay tuned for the round up of all the yummy red velvet desserts….I can’t wait to see what everyone made!

Whats Baking Badge

Soft Red Velvet Cookies with Cream Cheese Frosting

Yield:  16 cookies ( I got 21)

Cookies:

2 1/4 cups cake flour

3 Tbsp unsweetened cocoa powder    I used Valrhona Dutched

2 tsp cornstarch

1 1/2 tsp baking powder

1/2 tsp salt

1/2 cup softened unsalted butter

1/4 cup vegetable shortening  I like Crisco sticks- more accurate and less mess

1 cup granulated sugar

1 large egg

1 large egg white

1 1/2 tsp vanilla extract   (I used 1 tsp vanilla and 1/2 tsp vanilla paste)

1 tsp lemon juice or vinegar

Red food coloring   I used ~ 1.5 tsp of AmeriColor Super Red Gel Paste

Sprinkles,  if desired.

Cream Cheese Frosting

4 oz. cream cheese, softened

1/4 cup butter, softened (I used unsalted and added a pinch of salt)

3/4 tsp vanilla extract

2 1/2 cups powdered sugar

In a large bowl, whisk together the cake flour, cocoa powder, cornstarch, baking powder and salt until well combined.  Although the directions didn’t say, I sifted the mixture because my cocoa was lumpy. Set aside the flour mixture.

In the bowl of your KitchenAid mixer, blend the butter, shortening and sugar with the paddle attachment until light-colored and fluffy, ~ 3 minutes.  Mix in the egg, then the egg white, vanilla, vinegar (or lemon juice) and food coloring.

With your mixer on low, slowly add in the dry ingredients. Mix just until combined.  Scrape down the sides and bottom of the bowl with a spatula to make sure every last bit is incorporated.

Cover your mixing bowl with plastic wrap. Chill x 2 hours.

Preheat oven to 375 degrees.  Line a cookie sheet with parchment paper or a Silpat.

Remove the dough from the fridge. Shape the dough into ~ 3 Tbsp balls. I got 8 cookies per sheet. Grease or lightly wet your hands and press the dough down to about 1/2-inch high.

Bake ~9 to 11 minutes. Rotate the cookie sheet halfway through the bake time.  Remove the sheet from the oven and cool the cookies on the baking sheet ~2 minutes before transferring to a cooling rack.

Cool completely before frosting.

For the frosting:

In the bowl of your KitchenAid, with the whisk attachment, whip the cream cheese and butter until light-colored and fluffy.  Blend in the vanilla. Slowly add in the powdered sugar, blending until well combined and fluffy. I added about 1 tsp half and half to thin the frosting out a bit to make piping easier. 

Source:  Cooking Classy

Soft red velvet cookies with cream cheese frosting

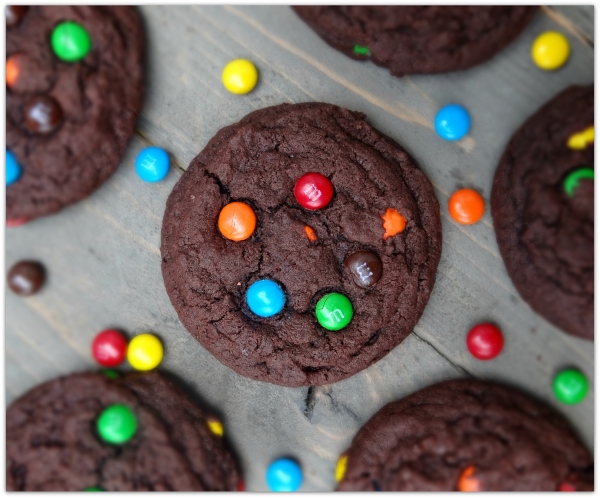
Soft and Chewy Double Chocolate M&M Cookies

Soft and Chewy Double Chocolate M&M Cookies

My daughter loves to bake with me. Last weekend, she asked if we could make some cookies. So I pulled up my Pinterest cookie board and told her to pick one.  She is a total chocolate lover like her mom, so these were an easy choice for her.  Chocolate + cookies + M&Ms? It doesn’t get much better for a 6-year-old.   We set to work, her measuring and pouring and then her aunt called.  She is crazy about her aunt, so the cookie idea was quickly abandoned for girl talk.  She was sad that after her 20 minute phone call, I had finished the batter and had a sheet in the oven.  Well, the type A in me could not leave cookie dough unfinished.  But, no worries. All was forgiven when she tasted this cookie.  Sammie said “I have to say, my taste buds went on a yummy trip”.  I love this girl!  And I have to agree. These were some delicious cookies. The cookie base was very brownie-like and chewy. The M&Ms gave a nice pop of chocolate flavor and just look adorable anyways.  This one is definitely a keeper. A good lunch box cookie for sure. 

Soft and Chewy Double Chocolate M&M Cookies
Yield: 24 cookies.  I only got 18.

1 1/4 cups all-purpose flour
1/4 cup plus 2 tablespoons unsweetened cocoa powder   I used Valrhona Dutch Processed
1 teaspoon cornstarch
3/4 teaspoon baking soda
1/2 teaspoon salt
1/2 cup (1 stick) unsalted butter, at room temperature
1/2 cup packed light brown sugar
1/4 cup granulated sugar
1 large egg, at room temperature
1 teaspoon vanilla extract
1 cup mini M&Ms   I used 3/4 cups:   1/2 cup for the dough and 1/4 cup to press into the top of the dough

Preheat oven to 350 F. Line one or two baking sheets with parchment paper.  I never bake more than one batch of cookies at a time.

In a medium bowl, sift the following together:  flour, cocoa powder, cornstarch, baking soda, and salt.  I almost never sift, but when cocoa powder is involved, I do because it is always so lumpy. In the bowl of your KitchenAid with the paddle attachment, cream the butter, sugar and brown sugar on medium until light and fluffy, ~3 minutes. Beat in the egg, then the vanilla.  With the mixer on low,  add the dry ingredients a little at a time, beating until just combined.  Stir in the mini M&M’s by hand with a rubber spatula.  I would add about 1/2 cup to dough and reserve 1/4 cup to press into the top of the cookies after they are portioned. They look prettier this way.

Using a small cookie scoop, drop the dough onto the prepared baking sheets, about 2 inches apart. Press the reserved M&Ms into the top of each ball. About 5 or 6 should do it. Bake for about 8 minutes (rotating your cookie sheet(s) halfway) or until the edges of the cookies are set.  The centers may look a bit underdone – but they will finish baking on the cookie sheet. Please do not over bake! No one likes dry, burnt cookies.  Allow the cookies to cool for a few minutes on the cookie sheets.  Remove the cookies from the sheets and allow to cool completely, if you can wait, on a wire rack.

Source:  Tracey’s Culinary Adventures

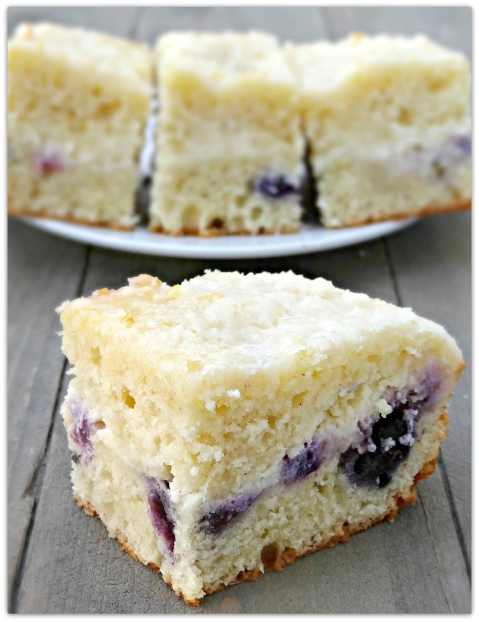
Blueberry lemon cream cheese coffee cake

Blueberry lemon cream cheese coffee cake

Cream cheese coffee cake has been the most popular recipe on Just Baked, by far.  Again, thank you Mother Thyme for a wonderful recipe.  Every time I make this cake, everyone says it is the best coffee cake they ever had and asks for the recipe. It really is delicious with the buttery cake, cheesecake-like filling, streusel and sweet glaze.  As good as it is, I decided to change it up this time by adding lemon and blueberries.  Don’t you just love how lemon brightens the flavor of blueberries?  The changes were simple. I added lemon extract to the cream cheese filling, subbed lemon juice for milk in the glaze  and added lemon zest to the cake.  I pressed about 1/2 pint of blueberries into the cream cheese layer. With a great, basic recipe like this, the flavor possibilities are endless.  I brought the cake to work as a treat for my coworkers and came home with an empty pan.  Empty pan = success.

Cream Cheese Coffee Cake

Yield: 13 x 9 cake

For the filling:

Two 8 oz. packages cream cheese, softened (light or regular)   I used regular

½ cup sugar

½ teaspoon vanilla extract

1 large egg

1/4 tsp lemon extract  optional

For the cake:

3 cups all-purpose flour

1 teaspoon baking powder

½ teaspoon baking soda

½ teaspoon salt

½ cup (1 stick) unsalted butter, softened

1 cup sugar

4 large eggs

1 teaspoon vanilla extract

zest of 1 lemon

1 cup sour cream (light or regular)

For the streusel topping:

¼ cup sugar

¼ cup flour

3 tablespoons butter, chilled and cubed

For the glaze:

¼ cup confectioners’ sugar

1/2 to 1 T lemon juice

Preheat oven to 350F.  Grease/flour or spray a 9 x 13 cake pan. Set aside.

Make the filling:  In the bowl of an electric mixer fitted with the paddle, mix together the cream cheese, sugar, egg, vanilla and lemon extract (if using) on medium-low speed until creamy.  Set aside for the filling.  (If you have 1 bowl and paddle, you will need to put this mixture in a separate bowl, and wash them to use to make the cake batter)

Make the cake batter:  In medium bowl, stir together flour, baking powder, baking soda and salt until well combined. Set aside.

In the bowl of an electric mixer fitted with the paddle, cream together the butter and sugar on medium-low speed.  Add eggs one at a time.  Add the vanilla extract and lemon zest.  Slowly pour in the flour mixture alternating with the sour cream until it is all combined.

Spread half of the batter into the prepared cake pan with a spatula.  Spread the cream cheese filling evenly on top. Arrange as many blueberries as you like, I did about 1/2 pint, on top of the filling. Top with remaining cake batter and smooth with a spatula.  Using a butter knife, gently swirl in the batter.

Make the topping:  Add the sugar, flour and chilled butter in a small bowl.  Stir using a fork or pastry blender until the mixture is crumbly.  Sprinkle the streusel on top of cake batter.

Bake for 40-45 minutes until a cake tester inserted in the center comes out clean.  Cool on a rack.

To make the glaze:  In a small bowl, combine confectioners’ sugar and lemon juice until it is the right consistency for drizzling.  Drizzle over cake.

Source: Mother Thyme; Sweet Pea’s Kitchen

  • Just Baked

    Follow Me on Pinterest
  • Recent Posts

  • Categories

  • Archives

  • Enter your email address to follow this blog and receive notifications of new posts by email.

  • Certified Yummly

    Certified Yummly Recipes on Yummly.com
  • Just Baked on Foodgawker

    my foodgawker gallery
  • Just Baked on Tastespotting

    my photos on tastespotting